Friday, August 29, 2008

Featured on INSPIRATIONAL!!!!


YAAAAAYYYYYYY YAAHOoooooooooooooooooOO!

Okay this is ME being all happy because I was featured on Inspirational!!!!

Dawn e-mailed me few days back and asked me if I was willing to be featured on Inspirational Blog... Helll YEAH! LOL :-D And on top of that she will be sending me some stamped images and my favourite "EMBOSSED PIECES USING CUTTLEBUG" . Oh my! Too much to take in :o)
I am NOT complaining! "Too much" is good stuff :) hahahhaa
If you guys wanna take a look HERE is a link to my feature on Inspirational.

Thursday, August 28, 2008

Fabric or Leather?

I don't know this maybe because I made this card. But everyone who takes a look at the picture of cards where I have used my own dyed paper and have given it a distressed look with faux stitching, asks "What kind of fabric is this?" "Where did you get such thin leather from?" And I am like WHAT?! Hey?! I still have no clue as to why people think that this is fabric or leather. Can I get away with "Faux-Fabric" or "Faux-Leather"? LOL

Even my dad said that it looks like leather when he saw the complete "Circular Design" card. Hmmm, it must really look something like it then. Anyway, let me know so I get my eyes checked again :-p

Again I tried to do something different with the ribbon. Could not find "orange" gem to stick on the ribbon :-( otherwise I would have added that to the ribbon.

The small flowers are REALLY very small! LOL I drew them on the self dyed orange paper and when I was cutting them I realized they were rather "too" small, hence the untidy cutting :-( But after the placement they looked cute :o)

I made the swirls using embossing cone and applied some embossing paste in the middle of the flowers and sprinkled very little orange/rust glitter on it.

I have also dyed the brown paper myself, this is the same left over paper from the circular design card. I just did not want to throw away the pieces. Faux stitching always looks good on it. Especially with a gold pen.

Wednesday, August 27, 2008

Say "NO" to stitching! LOL


No, not to faux stitching obviously! :-p But this card really drove me crazy. Why? Well, because SUPER I decided to stitch the sequins for a change! Silly , silly me! tuth tuth tuth :-p

Anyhooo, I had this really whimsical image in my head about swirls made up of sequins blah blah, when I started to put that on card stock it was not so bad till I was half way through the FIRST swirl. It was taking hell loads of time, I swear! I thought I would name the post "DO NOT TRY THIS AT HOME" LOL


The final result was not even close to being whimsical. Ah so much for the image in my head. *sob sob*
I have used a very beautiful ivory card stock. It looks like it is handmade because of all the little pieces of wood like thingy. After sewing on the sequins, I pasted the card stock on to gold paper. The edges on the gold paper have been tampered with and then coloured green.
I took out my dainty gold ribbon to make a cute flower which also did not turn out cute :o( (It's just not my day today)
The same ol' flower :o) But this time I crumpled it. I added lots of adhesive in the middle and showered both green and gold "zero" number sequins.

EDIT: Thank You for the correct spelling of SEQUINS! LOL

CASEd Card


This is a CASEd card. I love all of Steph's cards. They are so simple and pretty. And yeah very vibrant! When I saw this particular card I just fell in love with how the bold chocolate brown was framing the soft pink and blue. So I took my printer papers, as I did not have these colours in card stock. I added little shading along the borders to give the papers some body, they were looking quite plain before. I do not have any stamps, as most of you know. So I drew the cupcake image and coloured it up :o) And I think the cupcake looks cute, I will be using it again for sure :-D
The two differences between my card and hers is that I have used brown cardstock instead of white as the main card and this little thingy that I added. I don't have punches so I used sequins, I decided to save them so I cut them in half and pasted them along the circle. It takes time and effort but the end result is always refreshing :0)

Black!


One layer card?!?!! Oh wow! Actually, I wanted a quick card. All the things were made earlier for a card that was never made :0(


My same ol' hand made flowers, hand made swirls, embellishment and little doodling.

I hope the glare in the image is not disturbing you, so lazy of me not to retake the pic.


I have coloured the horizontal borders with sea-green and bright pink colours and outlined it with a green gel pen.
Really wanted to use ribbons of all the colours in the flowers.
I like this X kinda way the ribbon looks. At first I thought of using all three ribbons parallel in three vertical stripes. But it did not appeal to me that much, well after trying other possibilities I ended up doing this which I think looks far better than what I was planning to do.

Tuesday, August 26, 2008

Circular Design...

Mel of Mel Stampz keeps me going strong with her wonderful and motivating comments. She made me realize that I do well even with my limited supplies. Whenever I read her comments I end up drawing more. This time I drew so many different circular designs, like the one HERE. And lots of butterflies too.


I am only showing you one of those circular designs, and hopefully you will get to see more in the future.


I have dyed the brown paper and the red one is just a plain card stock. Again, I can not live without playing it rough with the edges (I have no clue as to why "being raggy" attracts me so much! LOL). Oh by the way, thanks to my dad, I got a nasty cut on my finger! To make the edges look like this I use a steel ruler (and always have). But this time as I was in the process of making this card, my dad came to check up on how much I was done. While looking at me fighting with the edges with my ruler he mentioned the word "Cutting Blade".... oh well, after that everything went real bad! LOL!

Now, that is it for the "blabbering" part.

I used gold pen on brown for faux stitching and brown on red. I used my new Faber Castell colours on the circle! (Yay!). Drew the circle on plain white printer paper, I cut it in a way so that I could have some white space. The white space, just outside the petals is really enhancing the flower otherwise it would have just blended in with the red card stock. After colouring and everything I pasted it on a red circle which was slightly bigger than the flower and then again on a brown circle, which was again slightly bigger than the red, and then on the card. All this just to pop it up a bit.

This is how the inside looks. In order to give this card a final ragged look I intentionally kept the length of both papers different so that it would really look as if pieces were stitched on.
This is MY version of the half window card LOL. This was not intentional, but my card was not "listening" to me so after I folded the front, I glued it! Just because it kept popping back up! :P
I am lovin the colours this time :0)


Saturday, August 23, 2008

From Bev With Love...


Do you know Bev of "All the things I Love". She is a super talented person, and when she found out that poor I use colouring pages website to print my images from and use them in cards! Being "oh so generous" and "caring" SHE, the lovely Bev sent these to me! Yeah! These cutie stamped images!!! (oh God I am using so many exclamation marks! I AM happy!)

I have not used them as yet, treasuring them because I didn't want to waste any! hahaha

No, Ill be using them in future!

Lots of love and thanks to BEV! (Check out her work!!! Super amazing!!!)

Three in One!


Three challenges in one!


2. Cupcake Craft Challenges (use flowers)


3. Whatchadoin Wednesday (use glitter)


Now I am sure that I can not live without these flowers! I don't know I just had to add these particular ones! :-p

Everytime I stop myself but I end putting the same design! Half my blog is filled with these! LOL

And yeah...the swirls too! :-p


Alright, so the details of this card are as follows..
I recently bought Faber Castell colour pencils. They are pretty dark and I got the 48 set :-D

Anyway, I coloured the entire border/edge of the card with two shades of blue and sea-green to match with the multiple colours used in the flowers.
I just love the colour of the flowers. The pink looks great, pops up the flower and enhances it's look!


This is how it looks when opened. I tried to make it look like the sketch I used, but open it differently. So when closed, it looks like the sketch.I tampered with the edges to give it a rough look and faux stitched it. I used a purple marker to enhance the tampered border of the turquoise center paper. Nothing else to tell! :-p


Oh yeah one more thing! I don't know where I got this idea! I wanted to use two ribbons on this space. In my previous card I had already used "on- top of the other" method so I wanted to do something different. End result does not suck! LOL

Friday, August 22, 2008

Sugary Sarah


I just love Sarah Kay images, I wonder why I have not used them. Maybe because I was treasuring them! hehehe
Anyway, this card is for the sketch challenge at A Spoon Full of Sugar. I have got a couple of challenges lined up, I AAAMMM working on them! :o)
About the card... as I chose the colour combo for this card, I did not even remember to check if I have the matching glitters or paper. All I use are wrapping papers instead of designer papers (I don't think that we have those beeeauutiful papers you guys use). Anyway, here is where I tell you about the pathetically drawn and painted background behind the Sarah Kay image! LOL Yeah that is done by me. I doodled for a while to get something out of it, so I could use two colours, both plum and olive. Used colour pencils, paints markers and what not to get the effect I wanted, hence the dirty look. Hahahha

I coloured the vertical borders of the card with an olive coloured pencil and then outlined it with a gold pen. The bordering helped a lot in framing the card and giving it a better look. I added faux stitch without piercing just for the heck of it! :-p


Because the plum card sheet was not textured and I don't have cuttlebug or any embossing folder I doodled a bit. Just enough to fill the weird empty space. Good thing I had a gold pen, otherwise this card was looking so plain.


The flower was added in the end.. I made this quite a few weeks back and did not where to use it. Good thing I chose these colours!

Ella Ballerina!

Hello everyone!
Check out this cutsie elephant that I have used on my card. I took this image from the same colouring pages website that I take all my images from. I am not a big fan of elephants but this dancing elephant caught my eye! She is just so freakin adorable! Muaah! Kisses to her! I have named her Ella Ballerina! LOL
Oh well, the flowers... hand drawn (again). I used marker on the red one to give it a deeper look, the light gray one is coloured with a very light gray colour pencil and the last one was left as it is. I made several dots on it as they were looking so dull and "not so cute" without the filling.


I coloured the elephant with a couple of shades of gray and then I applied charcoal pearl paint on it to give it a sparkly look (sheen). I painted the skirt and the ballerina shoes with poster paint.

Tuesday, August 19, 2008

Finally a Challenge!


While I was stalking Bev of "All the things I love", I found this challenge blog "Stamp Something". Summer is the theme for the challenge this week. So here is my summery card.
The BIG two layered flower is hand drawn and hand cut and Ive dyed the paper myself. The black scallop shaped thingy is drawn by a help of a compass, making several circles. I have added gold sequence bail to give it a nice touch.
The cutie bee is from colouring pages. I have outlined it with embossing paste and then sprinkled glitter on it. Coloured it with markers this time.
The yellow background was looking too yellow so I used my black colour pencil to shade it a bit.

Another Desktop Card!


Here is the original card. Is it not the cutest card?! I really wanted to make one like this and so I did, with minor changes of course. I have no idea who is the card designer, if anyone knows the designer please let me know. I would never want to take credit for someone else's work. It takes a lot of patience and hard work to create such nice cards and it hurts even more if someone does not give you credit. I am specifically saying thanks to the person who designed and made this card. It is a wonderful creation. I love it. I hope you do not mind if I copied your card. If you do, please do not hesitate to let me know. I will pull it off immediately.


Okay so after all the thanks and praise to the owner of the original design. Here is my card.


I know it's a pathetic copy :P but I tried! LOL


The little birdie and flowers are hand drawn. I think they are stamps in the original one. All credit to the designer of the stamps as well.


You can note the differences easily. If I start explaining I know there be lots of eye rolling! :P
For details please view full.


Monday, August 18, 2008

Been Busy...


Hey peepz, I have not been uploading cards or taking part in challenges as most of my cats are not well. The weather is changing and it always affects them.
I manage to “complete” one card today. I have been working on it since my last post, but I was not getting the time to finish it.
Anyhow, it’s really a simple card. No flowery stuff from me this time lol
I have cut strips of paper and coloured them with a colour pencil. Glittered the odd ones with transparent glitter.
I have always loved the buckle thingy or whatever you talented ladies call it. So I took a piece of paper and made two cuts with the help of a blade/knife, inserted the ribbon in one and out from the other.

The design on the circle is drawn by me. And then coloured with two three shades of brown, same background colour and slightly glittered.
I did not paste the entire circle, just a glue dot at the center and lifted it up a bit.
See simple! :)

Wednesday, August 13, 2008

Second Award!


My second award! It feels good every time! LOL
I know I am not as good as you guys are butttttt love card making, so I am gonna be here a while :)
This is award is from one of my favorite blogs, and a very nice person who shares the nicest and the funniest stories about her mom. You guys must've guessed by now who I am talking about, it’s none other than Trudi of Made By Me. Thanks a bunch Trudi!
I will be passing on this award to the following ladies:
1. Bev
2. Annapurna
3. Sue
4. Steph
5. Jose


Here are the rules :
1.Use the twinks bank icon
2. Only 5 people allowed. (to be nominated) .
3. 4 of the 5 have to be dedicated followers of your blog
4. 1 is to be someone new or recently new to your blog and live in another part of the world.
5. You must link back to whoever gave you the award.

Box Card

I usually make this when people want to give chocolates as gift along with a card or if they want to give many cards.

You can add chocolates or sweets and put the card on top of them.


I have dyed the paper myself, Khaki or Army colour. Roughed it around the edges.
I drew the flowers on gold wrapping paper and applied glitter on the edges. For some flowers I used brown marker to give them an antique look.
There is a lot of sequence and embossing paste effects.
I totally forgot to take picture of the inner side. Hopefully I'll edit later, too lazy at the moment! hahahaha
This is how the box looks when closed. I spray painted the fern and the shells, along with some dried flowers. Sponged gold paint along the sides of the box. I dyed the box too so that I could get a rough look and textured card sheet in the end.

Desktop Card!


This card is created by Christina Fischer. I am sorry I do not have a link to her blog but I am mentioning her name. It's a wonderful card Christina! I had this card saved on my desktop since long, finally I had the courage to make one like it.

I made one like this, incorporating the colour red. As all of you know by now that I do not have stamps or punches so I doodled on it instead.


I dyed the red paper myself. It is not visible here but it has a beautifully distressed look.

I took the picture in direct light that is why the red is looking way too bright. The card colours are quite subtle then the ones in picture.

I took brown colour pencils, light and dark and shaded the entire card to give it an antique look.


Can you see the doodling??
Drew the heart myself. I had to cut it out so neatly just to safe the extra paper. You can see both the heart that I have cut and the paper from which it has been cut from.
This one is one of my neatest cuts! LOL

For a Friend...

I am making quite a few cards for a friend of mine, Sofia. I didn’t give her anything on her engagement and so I thought why not give her lots of cards. Therefore I am going to make lots of cards, mostly CASED. But these ones are my own.


I used the same wrapping paper and same design on both the cards. The only difference is that I made one with a butterfly for the Verve challenge.

I outlined the flowers and stems on the wrapping paper with gel pen and aqualip (embossing pen).

Faux stitched all around it and I also played a little with the edges to make it look rough. Then I outlined the edges with a pink gel pen and inside with a blue one.


The butterfly has been cut from the same paper. I used a few gel pens to outline it and added a little sequence. Doesn't show up clearly in the image though. I added pearly beaded feelers.


I did the same thing here too. The only time taking job was to draw these small flowers, cut them and then outline them with gel pen. These are really quite small.

Here you can look closely at how untidily I have made them! LOL


Saturday, August 9, 2008

Bev's Fab Blog Candy!


The lovely Bev of "All the things I love" is offering blog candy. On offer is a selection of her crochet flowers, 20 odd Hanglar & Stanglar stamped images, a selection of flowers (mostly Prima), some Michaels Wedding Confetti flowers (pearlescent ivory), 2 reels of printed satin ribbon, 8 x 8 Papermania Simply Elegant pad, a Studio G Alphabet Set and a Studio G set of Christmas clear stamps.

If you havn't checked out her blog yet then please do and just leave a comment under the post "Blog Candy Time". She makes the most wonderful cards.

Friday, August 1, 2008

Swirls Again!


Lovin the swirls! :)

It's hard work, but I love the end result. They just look so beautiful. This card was made for the same person, my mom's colleague. He wanted it for someones birthday.

I discovered making swirls recently so I had to make one card specially based on swirls.


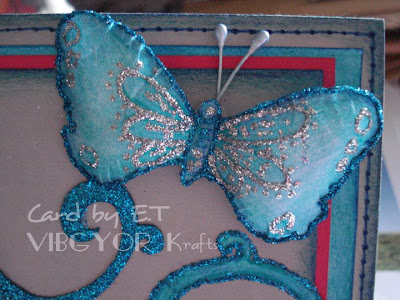
The card was looking quite empty, I drew a butterfly, coloured it up with the same colour pencil (I really wanted this colour to be the MAIN colour of the card). Enhanced it with some shading, embossing paste and glitter. One more empty space filled! LOL. I have been trying to get my hands on this sea-green colour but no luck at all. Just when I gave up any hope of getting this colour paper, I discovered I had a colour pencil just the same shade I wanted! So the light green parts you see in the card are coloured by a colouring pencil :)


Okay so this is no punched scallop shape or whatever you guys call it. This one is made using a compass. I individually drew semi circles and then cut this shape up. This is why a couple of them are a little different from the rest, and obviously the edges are not as neat as you get when you use punches. I wanted to write happy birthday in the circle but it was not appealing to me, so I made a flower and loved how it started looking. I did one more thing...


Inside the card I added this little print out. Coloured it up and did my thing with it, the colouring, glittering, faux stitching etc. Added a frame kinda thingy, just to liven it up a bit.