Showing posts with label Guest Designing. Show all posts

Thursday, March 28, 2019

Birch Press Design Card Set + Video


Birch Press Design Thankful Mandala | Altenew Watercolour Brush Markers | Erum Tasneem | @pr0digy0

Hi there everyone!
Today I will be sharing a card set with you featuring products from Birch Press Design.
Birch Press Design Thankful Mandala | Altenew Watercolour Brush Markers | Erum Tasneem | @pr0digy0

For my cards today, I have used the Thankful Mandala Stamp Set.

Birch Press Design Thankful Mandala | Altenew Watercolour Brush Markers | Erum Tasneem | @pr0digy0

I heat embossed three panels in Antique Gold Embossing Powder
Next, I used Altenew Brush Markers in Desert Night, Persian Blue and Lagoon.
You can watch the video at the end of this post to watch me colour these.

Birch Press Design Thankful Mandala | Altenew Watercolour Brush Markers | Erum Tasneem | @pr0digy0

What I did was I scribbled colours onto the watercolour cardstock in ring form and then spritz the panel very liberally with water. I also used a watercolour brush to move some of the colour around. I set this aside to air dry. 

Once the panel was dry, I cut the panel in half and then cut out rings out of it. I then adhered these to the card on different levels of foam tape.


Birch Press Design Thankful Mandala | Altenew Watercolour Brush Markers | Erum Tasneem | @pr0digy0

Next, I die cut the Sugar Script You Die in DCWV Gold Glitter Cardstock. I layered this up to make it sturdy. To finish, I heat embossed an accompanying sentiment on a black strip and tucked it under "you".


Birch Press Design Thankful Mandala | Altenew Watercolour Brush Markers | Erum Tasneem | @pr0digy0
I followed the same technique to make my second card. I just changed the layout to landscape. 

Birch Press Design Thankful Mandala | Altenew Watercolour Brush Markers | Erum Tasneem | @pr0digy0

For the sentiment, I used Sugar Script Thanks Die.


Birch Press Design Thankful Mandala | Altenew Watercolour Brush Markers | Erum Tasneem | @pr0digy0

To make this gatefold card, I took a 9" x 6" piece of cardstock which I scored at 2.25" and 6.75".

Birch Press Design Thankful Mandala | Altenew Watercolour Brush Markers | Erum Tasneem | @pr0digy0

I adhered the half mandalas onto each flap/gate. For the belly band, I took a strip of vellum and wrapped it around loosely, gluing it together at the back.
To finish, I adhered the die cut "Thanks" onto the vellum strip.

Birch Press Design Thankful Mandala | Altenew Watercolour Brush Markers | Erum Tasneem | @pr0digy0

I hope you liked my cards. I loved creating them and had tons of fun too!

Birch Press Design Thankful Mandala | Altenew Watercolour Brush Markers | Erum Tasneem | @pr0digy0

You can watch the video below or on YouTube.


Thank you for stopping by!!


Thursday, January 10, 2019

Guest Designing at Jennifer McGuire's Blog and YouTube


Hi friends!!
It has been a couple of days since the video went live, but I thought I would share this with my blog readers that I was invited early last year to be a guest at Jennifer McGuire's YouTube and Blog.
You can find the video HERE at Jennifer's YouTube. You can check the blog post HERE on her blog.

You will definitely like the card, it's one layer stamped piece and it turned out so well!

Thank you for stopping by!


Thursday, June 14, 2018

Guest Designing for Spellbinders


Hello friends!
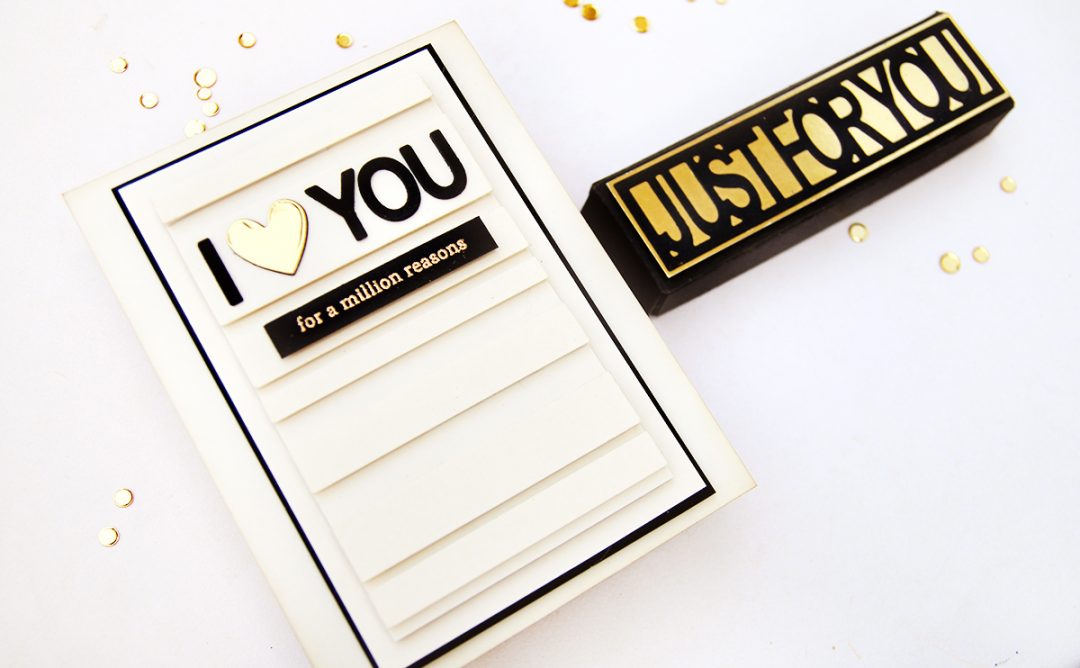
I have a card plus chocolate box set to share over at the Spellbinders blog.
Would love it if you hop on over and take a look!


Friday, May 18, 2018

Guest Designing at Pretty Paper Studio


Hello friends!
I am guest designing over at the PPS UAE blog, featuring their new line of stamps!


Thursday, April 26, 2018

Guest Designing: Spellbinders Watercolor Blessings


Hello friends!
I am so excited to be guest designing for Spellbinders again.
I am sharing a messy watercolour card on their blog.
Would love if you check it out.
Thank you♥

Saturday, December 23, 2017

Guest Designing at Wplus9


WOOT WOOT!
I am over at the WPLUS9 blog!

WHAAAAAAATT!!!!

Hop on over! Leave me a bit of love!
I have two cards to share!

Sunday, December 17, 2017

Guest Designing at Spellbinders


Spellbinders Moon Flower Cool Vibes Card watercoloured with Gansai Tambi | Erum Tasneem | @pr0digy0

Hello friends!
I have a card to share over at the Spellbinders blog.
I am very honoured to be guesting again and using another fantabulous stamp by Stephanie Low.
I would love for you to hop on over and leave a comment :)
hugs,
Erum

Friday, November 24, 2017

Guest Designing at Spellbinders - Trio of Cards Using Sunflower Cool Vibes


Hello everyone! I am honoured to be guesting for one of my favourite companies, Spellbinders. Today I have three cards to share with you using just Sunflower Cool Vibes Stamp Set from the Cool Vibes Collection by Stephanie Low. I will be showing you three ways to use this stamp set.


Spellbinders Sunflower Cool Vibes Stamp Set from the Cool Vibes Collection by Stephanie Low | Erum Tasneem | @pr0digy0

As you can see I kept the colours same on all three cards so that it doesn’t distract you from the design. Bonus that they look nice in the photo J

Spellbinders Sunflower Cool Vibes Stamp Set from the Cool Vibes Collection by Stephanie Low | Erum Tasneem | @pr0digy0

First and foremost, I have to say how beautiful this stamp set is! The intricate details all stamped perfectly and crisp. I used both stamps from this set several times with Versamark on watercolour paper. I then used Altenew Pure White Crisp Embossing Powder and heat set it.

Spellbinders Sunflower Cool Vibes Stamp Set from the Cool Vibes Collection by Stephanie Low | Erum Tasneem | @pr0digy0

Then, my most favourite part, I ink smooshed the background using Peacock Feathers and Chipped Sapphire Distress Inks. When the background was still a bit wet, I went in to drop some more of the same colours in a few places to add a bit more interest.

Spellbinders Sunflower Cool Vibes Stamp Set from the Cool Vibes Collection by Stephanie Low | Erum Tasneem | @pr0digy0

To add a little sparkle I rolled up some silver string, glued it on to my card front. I stamped the sentiment and popped it over the string with foam tape. I really wanted to add yellow enamel dots to my card instead of silver sequins but I ran out of them. I think the enamel dots would have looked so much better here and would’ve complimented the other two cards beautifully.

Spellbinders Sunflower Cool Vibes Stamp Set from the Cool Vibes Collection by Stephanie Low | Erum Tasneem | @pr0digy0

For my second card, I stamped the Sunflower twice on watercolour paper with Versafine Onyx Black Ink. I then watercoloured the petals using Peacock Feathers and Chipped Sapphire Distress Inks.

Spellbinders Sunflower Cool Vibes Stamp Set from the Cool Vibes Collection by Stephanie Low | Erum Tasneem | @pr0digy0

The flower center was coloured with a variety of yellows and greens from the distress ink family. I do love to watercolour with distress inks, they flow effortlessly. After the images were dry, I fussy cut them out and started working on my card front.

Spellbinders Sunflower Cool Vibes Stamp Set from the Cool Vibes Collection by Stephanie Low | Erum Tasneem | @pr0digy0

Again, I stamped the Sunflower repeatedly on to watercolour paper with Veramark and heat embossed it with Altenew Pure White Crisp Embossing Powder then heat set it. I already knew what the placement of my flowers and stamp would be, keeping that in mind I added grey watercolour to my background with varied concentration. By varied concentration I mean that the grey would appear dark in some places and light in others.

Spellbinders Sunflower Cool Vibes Stamp Set from the Cool Vibes Collection by Stephanie Low | Erum Tasneem | @pr0digy0

After my card front was dry, I popped my sunflowers on foam tape. I heat embossed the sentiment on black cardstock added a little more foam tape on this label so that it was on a higher level than the flowers.
I played around with the placement of all three elements till I found the perfect position.

Spellbinders Sunflower Cool Vibes Stamp Set from the Cool Vibes Collection by Stephanie Low | Erum Tasneem | @pr0digy0

I then covered my stamped images and sentiment label with my hand (you can even use a piece of cardstock or do this step before adding the images) and added black and grey paint splatters. In the end I added a few silver sequins for the bling.
Now onto my final card.

Spellbinders Sunflower Cool Vibes Stamp Set from the Cool Vibes Collection by Stephanie Low | Erum Tasneem | @pr0digy0

This one too has white heat embossed images and watercolouring! I stamped both the images from this stamp set on to watercolour paper with versamark in a way that it would make a corner border. Apart from this I stamped both the images again to add to the opposite corner.

Spellbinders Sunflower Cool Vibes Stamp Set from the Cool Vibes Collection by Stephanie Low | Erum Tasneem | @pr0digy0

Then I watercoloured the sunflower petals with Peacock Feathers only, the center with Spiced Marmalade and the outer design with Chipped Sapphire. For the smaller medallion, I used a mix of colours. This image reminds of ceramic tiles.
After the images were dry, I fussy cut the design leaving a white border along the design.

Spellbinders Sunflower Cool Vibes Stamp Set from the Cool Vibes Collection by Stephanie Low | Erum Tasneem | @pr0digy0

I stamped the sentiment with Versafine Onyx Black Ink and added paint splatters to my card front. I then popped up the two pieces I fussy cut on each corner and added a few sequins.

Spellbinders Sunflower Cool Vibes Stamp Set from the Cool Vibes Collection by Stephanie Low | Erum Tasneem | @pr0digy0

There you have it! A trio of cards using just one stamp set!
That is all from my side! 
Erum

Thursday, February 2, 2017

Guest Designing at Mudra Stamps


Hello!
I am guest designing over at Mudra Stamps today.
I have a colourful watercolour card to share with you.
Hop on HERE to check it out.
-Erum


Sunday, November 13, 2016

Guest Designing at MUDRA


Hello everyone!
I am guest designing over at Mudra stamps and I have three monster cards to share with you.
Please stop by my post HERE to check them out!
Thanks!
- Erum

Friday, August 12, 2016

Guesting with Ruby


How cool is this?
I am over Ruby's blog today - what an honour to be invited by the super talented Ruby herself.
I have a little interview there and a couple of cards to share with you.
I hope you will leave me some love there!


Saturday, July 25, 2015

Guest Designing at CUYL: Wood or Cork


Hey all!
Today is my final post for the Challenge Up Your Life guest DT spot.
I had fun during this time and you MUST check out the amazing design team they have!!
This fortnight the challenge is

Wood or Cork

Since I had nothing on hand I chose to go with my wood grain embossing folder to create a monochromatic card. I CASED my older card HERE.
Thank you for stopping by!
I think I stopped by everyone's blog who left a comment here, if I missed yours please leave a comment and I will hop right over!
love and more love!
Erum

Saturday, July 11, 2015

Guest Designing at CUYL: Masking


Hello everyone!
I am so sorry I have not visited your blogs in a while. Will make sure to stop by over the weekend.
It's my third card for the Challenge Up Your Life guest DT spot.
This fortnight the theme is

MASKING

Here is what I made:

Hero Arts Antique Engravings

This is a total Hero Arts card. Have not made one in a while. 
I stamped a butterfly on a separate piece of cardstock and used it as a mask to stamp several of them on the watercolor paper.
I also masked some parts of the butterfly with my versamark pen and then clear embossed it. I also used glossy accents as a mask (thanks Tejal for the tip!). 
The butterflies have been watercolored using several colours of distress inks.
Both stamps are by Hero Arts. The sentiment is heat embossed.
Stop by the CUYL challenge blog to enter!
That's all from my side today.
Have a wonderful day :)
- Erum


If you missed my Lia Stampz challenge post, click HERE


Saturday, June 27, 2015

Guest Designing at CUYL: It's All About Sequins


Hello again!
This is my second post today and it's another rainbow card for you.
I am guest designing over at Challenge Up Your Life for June/July and this is my second post as GD.
The theme this fortnight is

It's All About Sequins

I have inked up my background using distress inks, flicked some water droplets to add texture and then sprayed it with shimmer mist. The heat embossed sentiment is from Avery Elle.
Hope you liked it!


If you missed my other GD post from today, click HERE.


Guest Designing at Artful Crafting


Hello everyone!
I am guest designing over at Artful Crafting today. 
Artful Crafting is Pakistan's first ever online craft store (a dream come true really) and they recently launched the Artful Crafting Challenges.

This month the theme is

No Flowers

A bit about my card, I have used SSS die and stamp on a rainbow background which I created using various shades of distress inks.

For those who would like to know they are as follows: Festive berries, Barn Door, Fired Brick, Ripe Persimmon, Spiced Marmalade, Mustard Seed, Mowed Lawn, Crushed Olive, Evergreen Bough, Peacock Feathers, Chipped Sapphire, Salty Ocean, Shaded Lilac and Picked Raspberry.
 Please know you don't need all these shades to create a rainbow background, I just wanted to complete the card quickly without wasting time in mixing colors to make a new one.

I have layered the largest butterfly and placed it a bit offset. Added a few black splatters to balance the bold, black sentiment.

There is a ton of shimmer on the card which you cant see here but is visible in person.
Click HERE to go directly to the challenge post.


Until next time,
ciao
Erum


If you missed the All Dressed Up new release post, click HERE


Challenges:  sister act simply papercrafts,